Are you a DIY enthusiast looking to take your home improvement projects to the next level? If so, you’ve come to the right place. In this article, we’ll show you how to get the most out of your DIY endeavors and turn your house into your dream home. With our expert advice and simple step-by-step instructions, you’ll learn the tips and tricks to tackle any DIY project with confidence. Whether you’re a seasoned DIYer or just starting out, we have something for everyone.
Benefits of DIY Home Improvement Projects
Embarking on DIY home improvement projects can bring numerous benefits to homeowners. Not only does it save you money, but it also allows you to personalize your living spaces according to your preferences. By taking matters into your own hands, you have the freedom to unleash your creativity and make your vision a reality. Additionally, DIY projects can be a great way to bond with family members or friends, as you work together to transform your home.
Moreover, DIY home improvement projects provide a sense of accomplishment and pride. There’s nothing quite like stepping back and admiring the results of your hard work. Whether it’s a freshly painted room or a newly built piece of furniture, the satisfaction of knowing you did it yourself is unparalleled. So, if you’re ready to experience these benefits and more, let’s dive into the world of DIY home improvement.
Planning Your DIY Home Improvement Project
Before diving headfirst into a DIY home improvement project, proper planning is essential. Taking the time to plan will not only ensure a smoother process but also help you achieve the desired outcome. Start by identifying the specific areas or aspects of your home that you want to improve. This could range from minor upgrades, such as repainting a room, to major renovations, like remodeling a kitchen.
Once you have a clear vision, create a detailed plan that outlines the steps required to achieve your goals. Break down the project into smaller tasks and estimate the time and resources needed for each. Consider any permits or regulations that may apply to your project, and make sure to factor in any potential challenges or obstacles you may encounter along the way.
Essential Tools for DIY Home Improvement
Having the right tools for the job is crucial when it comes to DIY home improvement projects. Investing in quality tools will not only make your tasks easier but also ensure the safety of yourself and those around you. Start with a basic toolkit that includes essentials such as a hammer, screwdrivers, pliers, and a tape measure. These tools will come in handy for a wide range of projects.
As you gain more experience and tackle more complex projects, consider adding specialized tools to your collection. For example, if you plan on doing a lot of woodworking, investing in a circular saw or a router can greatly enhance your capabilities. Similarly, if you’re planning on doing electrical work, having a voltage tester and wire strippers will be essential.
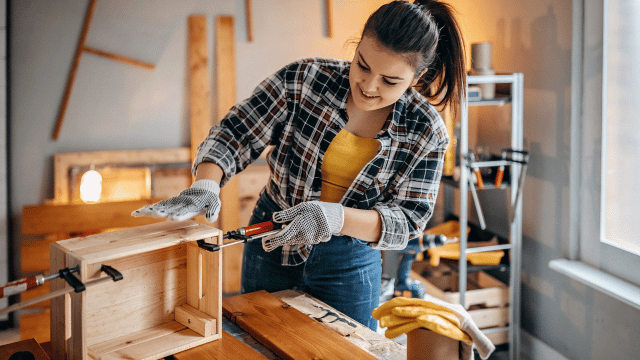
Remember, always prioritize safety when using tools. Wear appropriate protective gear, such as goggles and gloves, and ensure that you are familiar with the proper usage of each tool before starting any project.
Safety Tips for DIY Home Improvement
When it comes to DIY home improvement projects, safety should always be a top priority. Accidents can happen, but taking precautions can greatly reduce the risk of injuries. Here are some essential safety tips to keep in mind:
- Educate Yourself: Before starting any project, educate yourself on the proper techniques and safety procedures. Watch tutorials, read books, or take classes to ensure you have a good understanding of what you’re about to undertake.
- Protective Gear: Always wear the appropriate protective gear for the task at hand. This includes safety goggles, gloves, ear protection, and a dust mask, among others.
- Work in a Well-Ventilated Area: If you’re working with chemicals or paints that emit strong fumes, make sure you’re working in a well-ventilated area. Open windows or use fans to circulate fresh air.
- Use Tools Correctly: Follow the manufacturer’s instructions when using tools and equipment. Improper usage can lead to accidents or damage to the tools.
- Turn Off Power: When working on electrical projects, always turn off the power to the area you’re working on. This will prevent electric shocks and other potential hazards.
By following these safety tips, you can ensure a safe and enjoyable DIY home improvement experience.
Budgeting for DIY Home Improvement Projects
One of the key advantages of DIY home improvement projects is the cost savings compared to hiring professionals. However, it’s still important to set a budget and stick to it to avoid overspending. Here are some tips for effective budgeting:
- Research Costs: Before starting a project, research the costs of materials, tools, and any professional help you may need. This will give you a realistic idea of how much you need to budget.
- Prioritize Projects: If you have multiple projects in mind, prioritize them based on urgency or importance. This will help you allocate your budget accordingly and avoid spreading yourself too thin.
- Shop Smart: Look for deals and discounts on materials and tools. Compare prices from different suppliers to get the best value for your money.
- Consider DIY vs. Hiring Professionals: Assess your skills and the complexity of the project. If it’s beyond your capabilities, it may be more cost-effective to hire a professional rather than risking costly mistakes.
By budgeting effectively, you can ensure that your DIY home improvement projects stay within your financial means.
Step-by-Step Guide for Common DIY Home Improvement Projects
Now that you have a solid foundation in planning, tools, safety, and budgeting, let’s dive into some step-by-step guides for common DIY home improvement projects. These guides will provide you with the necessary knowledge and instructions to tackle various projects around your home.
Painting a Room
Painting a room can instantly transform its look and feel. Follow these steps for a successful paint job:
- Prepare the Room: Remove furniture, cover floors and fixtures with drop cloths, and fill any holes or cracks in the walls.
- Choose the Right Paint: Select a paint color and finish that suits your desired aesthetic. Consider factors such as lighting and the room’s purpose.
- Prepare the Surfaces: Clean the walls and apply a primer if necessary. This will ensure better paint adhesion and a more even finish.
- Apply the Paint: Start by cutting in the edges with a brush, then use a roller to cover the larger areas. Apply multiple coats as needed, allowing each coat to dry before applying the next.
- Clean Up: Remove any painter’s tape, clean brushes and rollers, and put furniture back in place once the paint has dried.
Tiling a Backsplash
Adding a tile backsplash can enhance the look of your kitchen or bathroom. Follow these steps for a professional-looking result:
- Plan and Measure: Determine the size and layout of your backsplash. Measure the area to calculate the amount of tiles and adhesive you’ll need.
- Prepare the Surface: Clean the wall and ensure it’s dry and free of any debris. If necessary, apply a primer or sealant to ensure proper adhesion.
- Layout and Cutting: Lay out your tiles on the counter or floor to determine the desired pattern. Use a tile cutter or wet saw to cut tiles to size if needed.
- Apply Adhesive: Mix the adhesive according to the manufacturer’s instructions and apply it to the wall using a trowel. Start in one corner and work your way across.
- Install the Tiles: Press each tile firmly into the adhesive, using spacers to maintain consistent spacing. Use a level to ensure the tiles are straight and aligned.
- Grouting: Once the adhesive has dried, remove the spacers and apply grout between the tiles. Wipe off any excess grout with a damp sponge.
- Clean Up: After the grout has dried, clean the tiles with a grout haze remover and seal the grout to prevent staining.
These step-by-step guides provide a glimpse into the world of DIY home improvement. With practice and experience, you’ll gain confidence and be able to tackle more complex projects.
DIY Home Improvement Ideas for Different Areas of Your Home
Now that you’re equipped with the knowledge and skills to handle DIY home improvement projects, let’s explore some ideas for different areas of your home.
Kitchen
- Cabinet Refacing: Give your kitchen cabinets a makeover by refacing them with new doors, hardware, and a fresh coat of paint.
- Countertop Upgrade: Replace your old countertops with new ones made of materials such as granite, quartz, or laminate.
- Backsplash Installation: Install a tile or mosaic backsplash to add a pop of color and protect your walls from splatters.
Bathroom
- Vanity Replacement: Upgrade your bathroom by installing a new vanity with a stylish sink and storage options.
- Shower Tile Installation: Replace outdated shower tiles with new ones to create a modern and refreshed look.
- Lighting Upgrade: Replace old light fixtures with energy-efficient options that provide better illumination.
Outdoor Area
- Deck or Patio Expansion: Extend your outdoor living space by building or expanding a deck or patio area.
- Landscaping: Enhance your curb appeal by adding new plants, flowers, and landscaping features.
- Outdoor Lighting: Install outdoor lighting fixtures to improve safety and create a warm ambiance in your outdoor spaces.
These are just a few ideas to spark your creativity. Feel free to mix and match or come up with your own DIY home improvement projects tailored to your preferences and needs.
Common Mistakes to Avoid in DIY Home Improvement
While DIY home improvement projects can be rewarding, they can also be challenging, especially for beginners. Here are some common mistakes to avoid:
- Skipping Proper Preparation: Rushing into a project without proper planning and preparation can lead to costly mistakes and subpar results.
- Underestimating Time and Effort: Be realistic about the time and effort required for a project. Don’t bite off more than you can chew.
- Ignoring Safety Precautions: Always prioritize safety. Cutting corners on safety measures can lead to injuries or accidents.
- Using Low-Quality Materials: Saving money on materials may seem tempting, but it can result in poor-quality outcomes. Invest in quality materials for long-lasting results.
- Lack of Patience: DIY projects require patience and attention to detail. Rushing through the process can result in shoddy workmanship.
By being aware of these common pitfalls, you can avoid making costly mistakes and achieve better results in your DIY home improvement projects.
Resources for DIY Home Improvement Inspiration and Tutorials
Looking for inspiration or guidance for your DIY home improvement projects? Here are some valuable resources to explore:
- Online Blogs and Websites: There are countless blogs and websites dedicated to DIY home improvement. These platforms offer a wealth of inspiration, tutorials, and tips from experts and fellow DIYers.
- YouTube Channels: YouTube is a treasure trove of DIY tutorials and project ideas. Search for channels specializing in home improvement, such as This Old House or Home Repair Tutor.
- Home Improvement Books: Visit your local library or bookstore to find books on various DIY topics. These books often provide detailed instructions and step-by-step guides.
- Social Media: Follow DIY home improvement accounts on platforms like Instagram and Pinterest for daily inspiration and ideas.
By exploring these resources, you’ll find a wealth of knowledge and inspiration to fuel your DIY projects.